Resetting your Surface Laptop can help resolve a variety of issues, whether you are dealing with performance slowdowns, software glitches, or preparing the device for a new user. This comprehensive guide will explore all the different methods you can use to reset your Surface Laptop, ensuring that you can follow the steps that best suit your needs.
Why You Might Need to Reset Your Surface Laptop
There are several reasons why you might consider resetting your Surface Laptop:
Performance Issues: Over time, files and applications can accumulate, leading to a slowdown in performance. Resetting your Surface Laptop can remove unnecessary files and restore your device to its original speed.
Persistent Problems: If your Surface Laptop is crashing, freezing, or experiencing other recurring issues, a reset can resolve these problems by restoring the system to its original state.
Preparing for Sale or Transfer: If you plan to sell or give away your Surface Laptop, a full reset will erase all your personal information and return the device to its factory settings.
Starting Fresh: Sometimes, you may simply want to start over with a clean slate, free of any installed apps, personal files, or settings. Resetting your device is the quickest way to achieve this.
Understanding the Types of Resets
Before proceeding with the reset, it’s important to understand the two primary types of resets available:
- Soft Reset (Keep My Files): This option allows you to reset your Surface Laptop while retaining your personal files. It removes all apps, settings, and installed programs but keeps your personal documents, photos, and other files intact.
- Hard Reset (Remove Everything): This option removes all personal files, apps, settings, and programs, effectively returning the Surface Laptop to its factory settings. It’s ideal if you want to sell or give away the device or if you’re experiencing severe software issues that require a complete reset.
Method 1: Resetting Through Windows Settings
Resetting your Surface Laptop through Windows Settings is the most straightforward method and works well when you can access the system normally.
Step 1: Access Windows Settings
Click on the Start menu (Windows logo in the bottom-left corner) and select Settings (gear icon).
Alternatively, you can press Win + I on your keyboard to open the Settings menu directly.
Step 2: Navigate to Recovery
In the Settings menu, click on Update & Security.
From the list on the left side, select Recovery.
Step 3: Start the Reset Process
Under the Reset this PC section, click on Get started.
You’ll be presented with two options:
Keep my files: This option retains your personal files while removing apps and settings.
Remove everything: This option removes all your personal files, apps, and settings.
Step 4: Follow the On-Screen Instructions
Choose the option that suits your needs.
If you selected Remove everything, you’ll also be given the option to Remove files and clean the drive or Just remove my files. Cleaning the drive is more secure if you’re selling or donating the device.
The reset process will begin, and your Surface Laptop will restart several times during the process. This can take some time, so make sure your device is plugged in and charged.
Method 2: Resetting Using a Recovery USB Drive
If your Surface Laptop isn’t functioning properly and you can’t access the Windows settings, a recovery USB drive can be used to reset the device. This method is also useful if you want to reinstall Windows from scratch.
Step 1: Create a Recovery USB Drive
You’ll need a separate Windows PC to create the recovery drive.
Download the Surface Recovery Image from the official Microsoft Surface support site.
Insert a USB drive with at least 16 GB of storage into the PC.
Follow the on-screen instructions to create the recovery drive using the downloaded image.
Step 2: Boot from the Recovery USB Drive
Turn off your Surface Laptop.
Insert the recovery USB drive into a USB port on your Surface Laptop.
Press and hold the Volume Down button and then press the Power button.
Release both buttons when the Surface logo appears. The device will boot from the USB drive.
Step 3: Reset Your Surface Laptop
Follow the on-screen instructions to reset your Surface Laptop using the recovery drive.
You will be prompted to choose whether to Keep my files or Remove everything.
Once you’ve made your selection, the reset process will begin, which may take some time depending on your choice.
Method 3: Resetting Through Advanced Startup Options
If your Surface Laptop is experiencing serious issues and won’t boot normally, the Advanced Startup Options menu allows you to reset the device from a safe environment.
Step 1: Access Advanced Startup
Press and hold the Shift key while selecting Restart from the Start menu.
Alternatively, you can access Advanced Startup by pressing F8 repeatedly during boot-up, though this method might not work on all Surface Laptop models.
Step 2: Navigate to Reset Option
In the Advanced Startup Options menu, select Troubleshoot.
Click on Reset this PC.
Step 3: Choose Your Reset Option
Just like in the Windows settings method, you will be given the choice between Keep my files or Remove everything.
Follow the on-screen instructions to complete the reset.
Method 4: Factory Reset Using Surface Hub
If your Surface Laptop is not responding to other reset methods, you may need to use the Surface Hub, a dedicated recovery tool provided by Microsoft. This tool is specifically designed for more serious issues.
Step 1: Download and Install Surface Hub
On another Windows device, visit the Microsoft Surface support site and download the Surface Hub software.
Install the software and connect your Surface Laptop using a USB cable.
Step 2: Use Surface Hub to Reset
Open Surface Hub on the connected device.
Follow the on-screen instructions to reset your Surface Laptop.
This process will restore the factory settings and remove all data on the device.
Tips Before You Reset Your Surface Laptop
Backup Your Data: Always ensure that important files are backed up to an external drive or cloud storage before performing a reset, especially if you’re choosing the Remove everything option.
Charge Your Device: Make sure your Surface Laptop is fully charged or connected to a power source during the reset process to prevent interruptions.
Log-in Credentials: After resetting, you’ll need to log back into your Microsoft account and reinstall apps. Ensure you have all necessary passwords and credentials handy.
Update Windows: Once the reset is complete, check for any available Windows updates. Keeping your device updated can help prevent future issues.
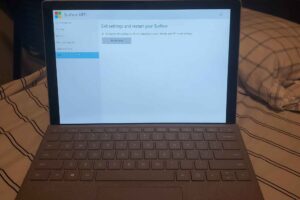
Post-Reset: Setting Up Your Surface Laptop
After resetting your Surface Laptop, you’ll be greeted with the Windows setup screen. Here’s what you need to do:
Step 1: Choose Your Region and Language
Follow the on-screen prompts to select your region, language, and keyboard layout.
Step 2: Connect to Wi-Fi
Connect to a Wi-Fi network to download any updates and sync your settings.
Step 3: Sign in to Your Microsoft Account
Enter your Microsoft account credentials. If you don’t have one, you can create a new account during the setup process.
Step 4: Set Up Security Options
Choose your preferred security options, such as setting up a PIN, password, or Windows Hello (facial recognition or fingerprint, if your device supports it).
Step 5: Reinstall Apps
After the setup is complete, you’ll need to reinstall any applications that were removed during the reset. Visit the Microsoft Store or the app’s official website to download them.
Common Issues and Troubleshooting Tips
Even after a reset, you might encounter some common issues. Here’s how to address them:
Device Won’t Boot: If your Surface Laptop doesn’t boot after a reset, try performing a hard reset by holding the Power button for 20 seconds until the device restarts.
Stuck on Setup Screen: If your device gets stuck during the initial setup, ensure it’s connected to a stable Wi-Fi network and fully charged. Restart the device if necessary.
Missing Drivers: If certain hardware components aren’t functioning correctly after a reset, visit the Microsoft Surface support site to download and install the latest drivers.
Resetting your Surface Laptop is a powerful tool for resolving various issues and giving your device a fresh start. Whether you choose to reset through Windows settings, use a recovery USB drive, access Advanced Startup Options, or utilize the Surface Hub, this guide has covered all the steps you need to follow.