
Introduction
A malfunctioning PCB (Printed Circuit Board) in your refrigerator can be a frustrating experience. The PCB controls key functions, from temperature regulation to compressor operation. When it fails, your appliance may stop cooling, over-freeze, or display error codes. Knowing how to handle a PCB board issue can save you time, prevent unnecessary expenses, and extend your refrigerator’s lifespan. This step-by-step guide covers everything you need to know about diagnosing, repairing, and maintaining your fridge’s PCB board.
Understanding the PCB Board in Refrigerators
What is a PCB Board?
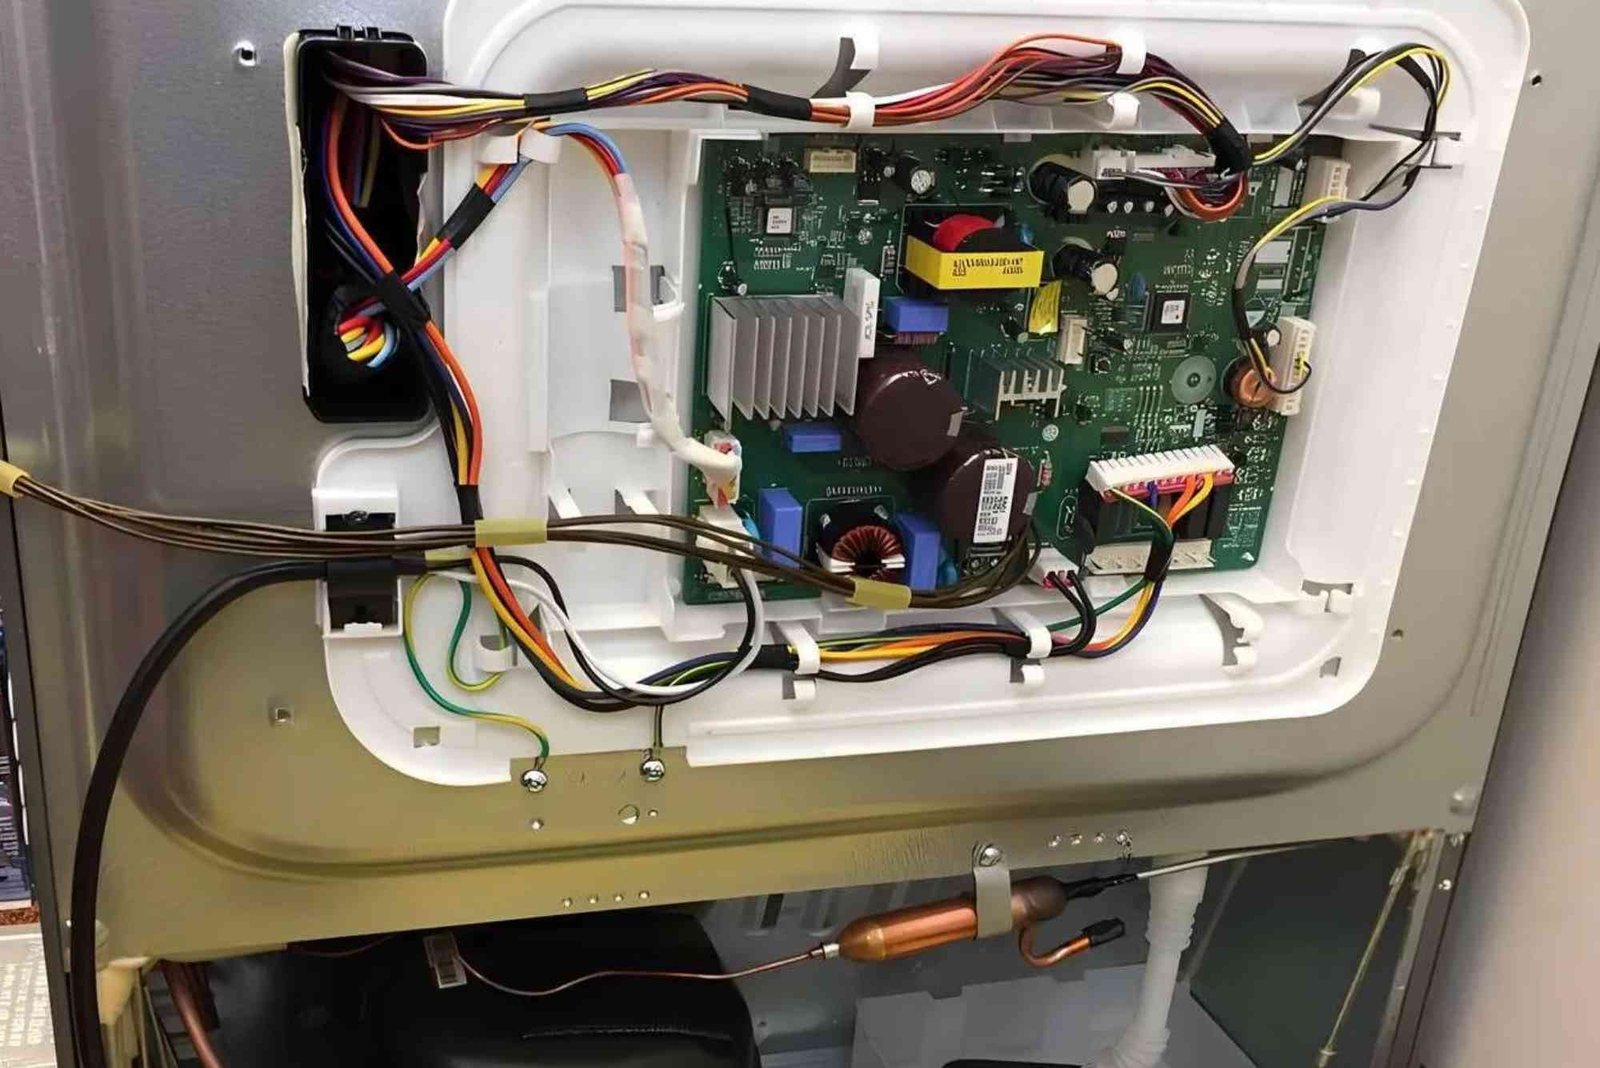
The PCB board acts as the brain of your refrigerator. It monitors sensors, controls the compressor, manages defrost cycles, and ensures proper cooling. When the PCB board malfunctions, your fridge may fail to maintain the correct temperature, display unusual behavior, or completely stop functioning.
Signs of PCB Malfunction
Recognizing early signs of a PCB board failure can prevent total breakdown. Common indicators include erratic temperature fluctuations, unusual noises, frequent cycling of the compressor, and LED or display errors. Sudden power surges or frequent electrical interruptions may also damage the PCB.
Importance of Proper Diagnosis
Before replacing the PCB board, proper diagnosis is crucial. Misdiagnosis can lead to unnecessary expenses, as many issues may mimic PCB failure. Simple problems like faulty sensors, blocked vents, or wiring issues often appear as PCB malfunctions. Always inspect all potential causes first.
Checklist for PCB Board Repair
Safety First
Unplug the refrigerator before inspecting or repairing any electrical components. Working with live circuits can result in serious injuries or further damage. Always use insulated tools and wear protective gloves.
Gather Essential Tools
You will need a multimeter, screwdriver set, insulated pliers, and possibly a soldering kit. Having the right tools ensures accurate testing and a safe repair process.
Inspect the Refrigerator
Check the interior and exterior of the fridge for obvious signs of damage. Look for burnt marks, loose wires, or moisture around the PCB area. Inspecting the fridge thoroughly helps identify hidden problems that could be mistaken for a PCB fault.
Test the PCB Board
Use a multimeter to measure the voltage and continuity of the board. Test each connection point and component, including relays, capacitors, and sensors. Faulty readings often indicate which part of the PCB has failed. Avoid touching components unnecessarily, as static electricity can damage the board further.
Examine Related Components
Even if the PCB shows faults, always inspect the refrigerator’s sensors, compressor, and wiring. Often, sensor failures can mimic PCB malfunction. Ensure all connections are tight, and replace any burnt or frayed wires before proceeding with PCB replacement.
Replace or Repair the PCB
If testing confirms a PCB failure, you can choose to repair or replace it. Some minor issues, like burnt capacitors or relays, can be replaced individually. For extensive damage, replacing the entire PCB may be safer and more reliable. Ensure the replacement board matches your refrigerator model exactly.
Reinstall and Test
Carefully reinstall the PCB, reconnect all wires, and plug in the fridge. Monitor its operation for a few hours to ensure all functions work properly. Check cooling efficiency, defrost cycles, and error indicators. Minor adjustments may be needed to stabilize performance.
Preventive Maintenance
After repair, preventive maintenance is essential. Regularly clean the condenser coils, check wiring, and avoid overloading the fridge. Using a surge protector can protect the PCB from electrical spikes. These steps reduce future PCB malfunctions and extend your appliance’s lifespan.
Tips for Effective PCB Repair
Understand Your Fridge Model
Each refrigerator model has a unique PCB layout. Familiarize yourself with the schematic diagram, often found in the service manual. Understanding the circuit paths helps identify potential weak points and reduces repair errors.
Avoid DIY Shortcuts
PCB boards are delicate. Avoid improvising or bypassing components, as this can cause further damage. If unsure, consult a professional technician. Learning the correct repair procedure is more cost-effective than repeated mistakes.
Keep Spare Parts Ready
Having common spare parts, such as capacitors, relays, and connectors, can speed up repairs. Many local appliance shops provide compatible components. Using genuine parts ensures reliability and maintains your fridge’s warranty coverage, if applicable.
Document the Process
Take photos of wiring and connections before disassembly. Proper documentation helps during reinstallation and troubleshooting future issues. Even small mistakes in wiring can prevent your fridge from functioning correctly.
Common Mistakes to Avoid
Avoiding mistakes during PCB repair is critical. One common error is failing to test related components first, leading to unnecessary PCB replacement. Another mistake is neglecting safety precautions; always disconnect power. Additionally, rushing the process without following a checklist can result in missed faults or damaged parts.
Repairing a refrigerator PCB board requires attention, patience, and proper knowledge. By following this step-by-step checklist, you can identify, repair, and maintain your fridge effectively. Remember to prioritize safety, inspect related components, and use the right tools. Proper preventive maintenance can also prevent future malfunctions.
If you want to learn more about refrigerator repair for PCB board malfunction, visit this detailed guide. For additional tips on improving your kitchen or appliances, explore our home & decoration basics and gather ideas from home design references for your next renovation. Taking proactive steps ensures your refrigerator runs efficiently and lasts longer, saving you time and money.
FAQs
How do I know if my refrigerator PCB board is faulty?
Look for erratic temperature, error codes, frequent compressor cycling, or unusual noises. Always check sensors and wiring first.
Can I repair a PCB board myself?
Minor repairs like replacing capacitors or relays are possible if you have experience and proper tools. Complex issues may require professional help.
How much does it cost to replace a refrigerator PCB board?
Costs vary by fridge model and PCB type. Replacement boards range from $50 to $300, depending on brand and availability.
How can I prevent future PCB malfunctions?
Use a surge protector, maintain wiring, clean coils regularly, and avoid overloading the fridge. Preventive care extends PCB life significantly.
Is PCB replacement covered under warranty?
Some manufacturers cover PCB replacement under warranty if malfunction occurs within the warranty period. Check your fridge’s warranty terms before repair.